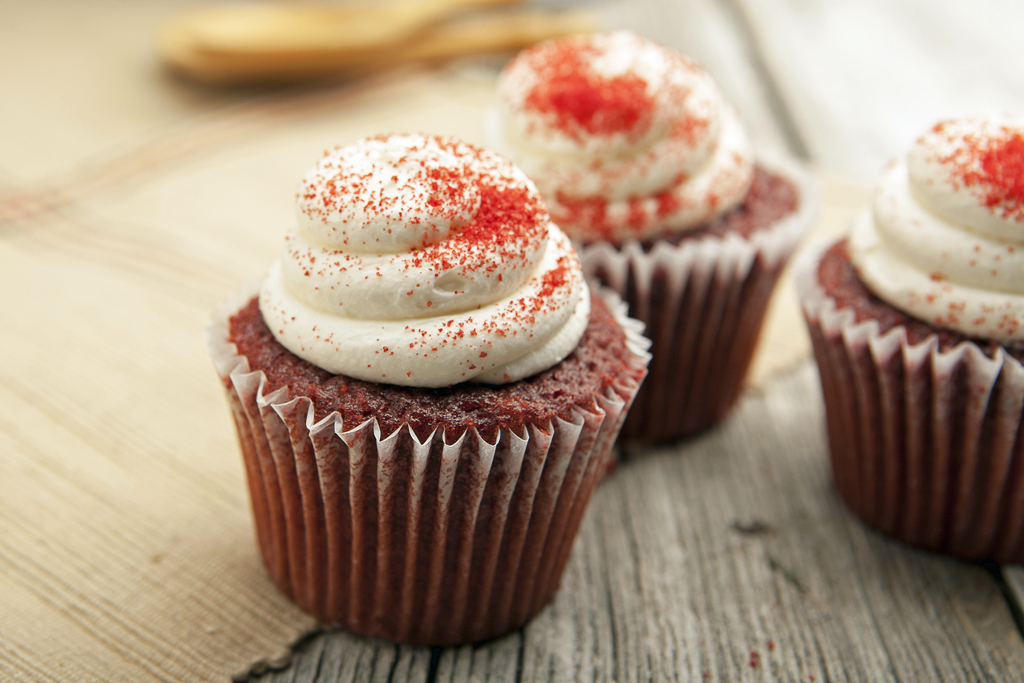
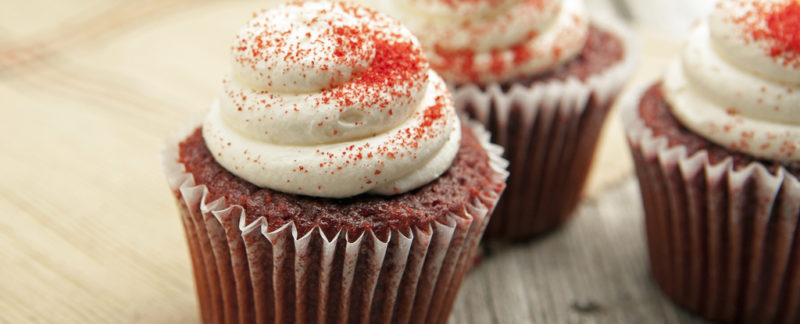
Red Velvet Cupcakes with Peppermint Frosting

I like to create treats for my son that will surprise him in some way. He always knows he can expect them to taste delicious and I always know they will be healthy for him. A win win! So as Valentine’s day approaches I started thinking about red treats. Red velvet cake came to my mind immediately.

Red Velvet cupcakes have a long history in our culture. The real question is whether or not they were ever truly red. Today we see them as red due to food coloring. But it may just have been an over exaggeration of the deep brown hue that dark chocolate had and as the years went by bakers improvised by adding red food coloring. Perhaps the red velvet was more of a description of the “velvety” texture associated with this type of chocolate cake more than it was the color. I mean, it’s not super sexy to say brown chocolate cake vs. deep red chocolate cake. It just brings to mind something a little racier and extravagant. And maybe a little secretive or surprising too.

Most recipes you find for red velvet cake are sweet and often a bit tart due to buttermilk. This recipe does not use buttermilk though the cream cheese frosting does bring a little tang to the party. One thing is for sure, the texture of these cupcakes is divine. Please use gel food coloring for this recipe, it is more intensely colored than liquid coloring and if you are adverse to food coloring I promise it will taste equally as decadent without it!

Red Velvet Cupcakes with Peppermint Frosting
 
Author: 
Nutrition Information
  • Serves: 6 Servings
  • Serving size: 1
  • Calories: 256
  • Fat: 23.7g
  • Carbohydrates: 14.2g
  • Fiber: 8.3g
  • Protein: 5.8g
Ingredients
Cupcakes
  • 3 large eggs
  • 3 tbsp coconut milk
  • 3 tbsp unsalted butter, melted
  • ¼ cup xylitol
  • Pinch pure powdered stevia
  • 1 tsp vanilla
  • ½ tsp red food coloring (use less if using a gel food color)
  • ¼ cup coconut flour
  • 2 tbsp unsweetened Dutched cocoa powder
  • ¼ tsp baking powder
  • ¼ tsp salt

Cream Cheese Frosting
  • ½ cup cream cheese
  • ¼ cup unsalted butter
  • 2 tbsp erythritol
  • ½ tsp vanilla
  • ¼ tsp peppermint extract
  • 4 sugar-free starlight mints (optional)
Instructions
  1. Make Cupcakes: Preheat oven to 375°F. Prepare a muffin tin with paper cups or use a silicone mold.
  2. In a medium bowl, whisk the eggs with the coconut milk, butter, xylitol, stevia, vanilla and red food coloring.
  3. In a separate bowl whisk together the coconut flour, cocoa powder, baking powder and salt. Add the egg mixture and whisk to fully incorporate the dry ingredients.
  4. Divide into the muffin cups, place in the oven and bake for 15-18 minutes until fully set in the center. Remove from the oven and cool for 10 minutes before removing from the pan and finish cooling on a wire rack.
  5. Make Cream Cheese Frosting: Powder the erythritol and set it aside. In the bowl of a stand mixer or with an electric mixer, beat the cream cheese until smooth. Add the butter and beat for 1 minute. Add the erythritol, vanilla and peppermint extract beating until incorporated into a smooth frosting; about 1 minute. Frost cupcakes and top with crushed mints (optional).
Notes
Net Carbs : 2.3
sugarOH : 12
 

Red velvet cupcakes will be the center piece at my home this Valentine’s day. But if red velvet isn’t your thing try these delicious brownies instead! Or perhaps cookies are more your love language?!

 

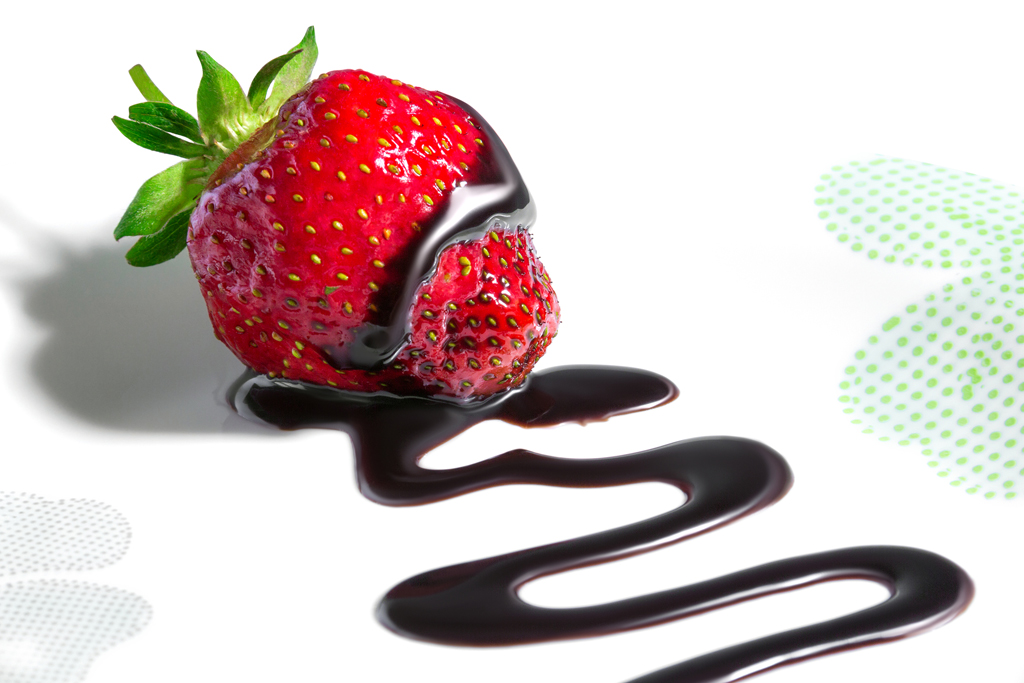
Bittersweet Chocolate Sauce

Chocolate sauce! Every baker and home chef needs an outstanding recipe for chocolate sauce. Chocolate sauce goes on everything from ice cream to fruit and beyond. Its limits are only bound by your creativity in using it.

This recipe is fairly straight forward. It makes a thick rich sauce that is flavorful enough on its own but layers nicely with additional flavorings as well.

Don’t forget to check out some of my favorite flavor enhancers below.

Bittersweet Chocolate Sauce
 
Author: 
Nutrition Information
  • Serves: 8 Servings
  • Serving size: About 2 Tbsp
  • Calories: 110
  • Fat: 9.8g
  • Carbohydrates: 9.2g
  • Fiber: 7.5g
  • Protein: 2g
Ingredients
  • 2 oz unsweetened chocolate
  • 1 oz sugar-free chocolate
  • 6 tbsp canned coconut milk
  • 2 tbsp xylitol
  • 1 tbsp erythritol
  • Pinch pure powdered stevia
  • 2 tbsp unsalted butter
  • 1 tsp vanilla
Instructions
  1. Finely chop the chocolates and place them in a medium bowl.
  2. Place the coconut milk, xylitol, erythritol, and stevia in a sauce pan over low heat. Stir continuously until the mixture just begins to bubble around the outside of the pan. Remove from heat and pour over the chocolate and let sit for a few minutes to allow the chocolate to melt then whisk to blend. Add the butter and stir until melted. Add the vanilla or other flavorings, stir into a smooth mixture and adjust flavor if necessary.
  3. Refrigerate for up to 2 weeks and serve warm by gently reheating. Makes 1 cup. Each serving is about 2 Tbsp.
Notes
Net Carbs : 1.7g
sugarOH: 6.3
 

Here are some of my favorite flavor additions:

Optional Flavorings:

  • ½ tbsp rum
  • ¼ tsp instant coffee or espresso powder
  • ¼ tsp cinnamon
  • ½ tsp raspberry extract
  • ½ tsp orange extract

But it doesn’t end there. As you may know, I also love essential oils and being that this recipe is rich in healthy fat it offers a great base to add essential oils. A couple drops of lavender served over blueberries is divine. Adding basil and serving with fresh strawberries highlights their sweetness with the green notes from the basil with the bitterness of the chocolate. Go lightly, it is easy to add to much essential oil. I hope you enjoy!


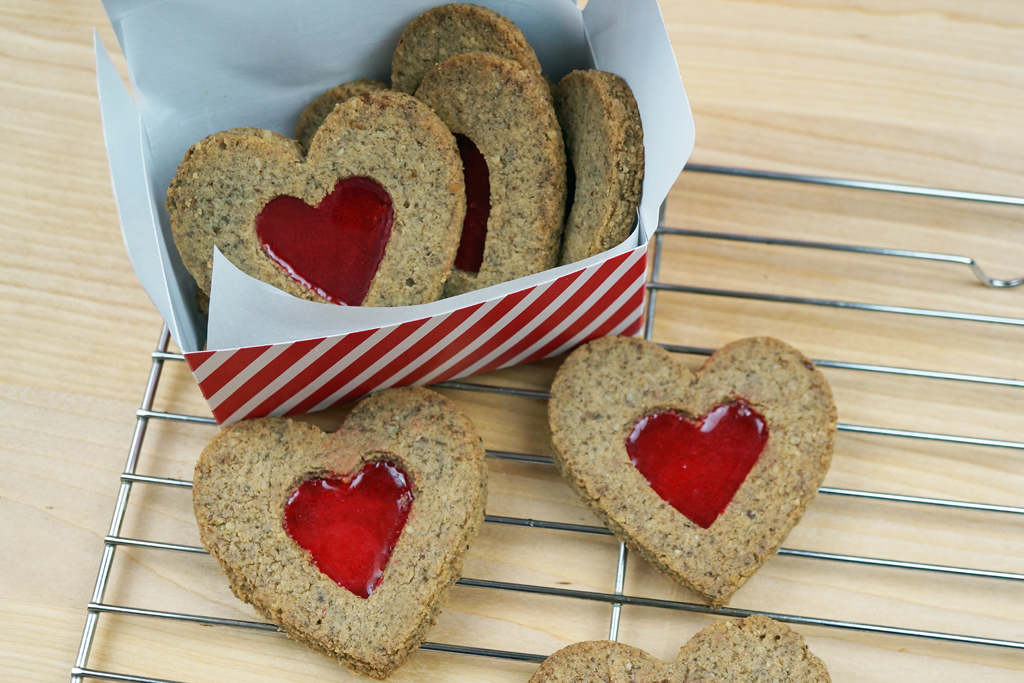
Sugar-Free Love Cookies

A fun take on Sugar-Free Window Cookies for Valentine’s Day!

A video version of this recipe can be found here.

Sugar-Free Love Cookies
 
Author: 
Nutrition Information
  • Serves: 44
  • Serving size: 1
  • Calories: 109
  • Fat: 8.6g
  • Carbohydrates: 6g
  • Fiber: 5.1g
  • Protein: 1.8g
Ingredients
  • ¼ cup unsalted butter
  • ¼ cup palm shortening
  • ⅓ cup erythritol
  • 2 Tbsp xylitol
  • 1 pinch pure powdered stevia
  • 1 egg
  • 1 tsp vanilla
  • 1 tsp lemon zest
  • 2 cups almond flour
  • 1 cup pecan or walnut flour
  • 2 Tbsp coconut flour
  • ¼ tsp baking soda
  • ¼ tsp salt
  • 1 ½ tsp cinnamon
  • ¾ tsp ginger
  • ½ tsp instant coffee
  • ⅓ tsp nutmeg
  • 15 red or pink colored sugar-free hard candies
Instructions
  1. In a stand mixer, cream together the butter, shortening, erythritol, xylitol, and stevia until light and fluffy; about 2 minutes.
  2. Add the egg and blend until fully incorporated. Add the vanilla and lemon zest; blend to combine.
  3. To a small bowl add the almond flour, pecan flour, coconut flour, baking soda, salt, and spices; whisk to combine.
  4. Add the flour mixture to the creamed butter and eggs. Beat until incorporated; about 30 seconds.
  5. Wrap the dough in plastic wrap and refrigerate for 30 minutes. Roll out between parchment or wax paper to about ¼-inch thickness and use cookie cutters that are about 2-3 inches in diameter of your choice. Cut out the center with a smaller cookie cutter and add scraps to the dough to be rolled out or leave and bake as smaller cookies. While cookies are chilling, put the candies into a plastic bag and use a rolling pin to crush them. If using different colors/flavors of candy do each separately. You will need about ⅓ of a piece of candy to fill the cutouts of each cookie.
  6. Preheat oven to 350°F. Line a sheet pan with parchment paper or use a silicon mat. Place cutout cookies about 1 inch apart and bake for 5 minutes, remove from oven and add crushed candy to cutout centers, put back in the oven and cook another 5-8 minutes until the candy has melted and the cookies are just beginning to brown on the edges. When done allow them to sit on the cookie sheet for 5-10 minutes to allow the candy to harden then transfer to a wire rack to cool completely. Store in an airtight container in the refrigerator. Makes about forty-four 2-inch cookies. 1 cookie is one serving.
Notes
Net Carbs : 0.9g
SugarOH: 3.9g